Where to Put Flood Lights on a House: An Expert Placement Guide
Flood lights play a major role in how a home feels and functions after dark, yet placement mistakes remain common. A fixture mounted too high, aimed too flat, or positioned without a clear purpose can create glare while still leaving critical areas in shadow. Effective flood lighting focuses on revealing movement, lighting walking surfaces, and controlling where the beam ends rather than chasing maximum brightness.
Homeowners around Jacksonville often ask Aloha Outdoor Lighting for help correcting poorly placed flood lights or designing layouts that balance security and visual comfort. The guidance below explains where flood lights belong on a house and how proper placement changes the way light actually works on your property.
Start With the Job, Not the Fixture
Flood lights should be placed based on what they need to accomplish. Security and safety lighting is about revealing people and pathways, not turning your property into a stadium. Architectural flood lighting is about shaping the home’s surfaces and features, not blasting everything evenly.
Walk your property at night and identify the real problem zones. Think in terms of “tasks”: cover the driveway approach, reveal the front door, eliminate hiding spots near gates, and brighten the side yard transition between fence and house. Flood lights work best when they support those tasks with controlled angles and clean cutoffs.
A smart plan also considers where you do not want light. Bedrooms, neighbor windows, and reflective surfaces like white garage doors can turn a well-intended fixture into a permanent annoyance. A flood light that looks “bright” from the street can still leave the ground in front of your steps too dark if it’s aimed poorly.
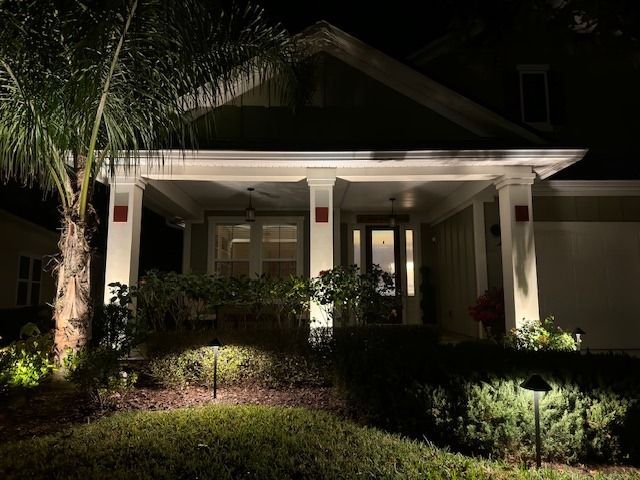
Front of the House: Entry, Garage, and Curb Appeal Without Glare
Most homes need flood coverage at the front, yet the front is also where glare and light trespass become obvious. Focus on three areas: the entry approach, the garage/driveway, and the primary facade planes.
Place flood lights so the beam hits the ground and vertical surfaces at a shallow angle, not straight into someone’s eyes. Mounting under the eaves near the corner of the house can work well if the fixture is aimed downward and slightly across the target area. A corner-mounted flood aimed across the driveway reveals movement better than a fixture aimed straight outward, since cross-lighting creates visible contrast on a person’s shape rather than flattening everything.
Entry lighting should prioritize the walking path and the door hardware area. A flood light that washes the wall near the door can help cameras see faces, yet avoid pointing directly at the door glass or sidelights. Bright light reflecting off glass can ruin visibility from inside and can also overwhelm a camera sensor, leaving a white blob where you wanted detail.
Garage-facing floods should be aimed to cover the driveway apron and the approach, not just the door panel. Many people mount a light above the garage door and aim it outward. That often creates a bright strip on the driveway close to the house and darkness farther out where vehicles and people actually approach.
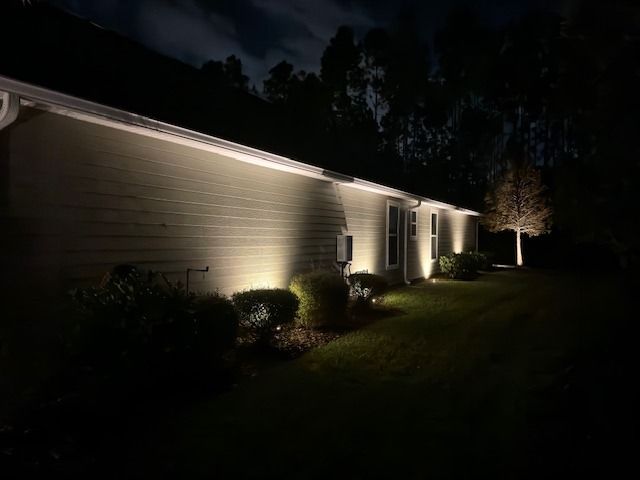
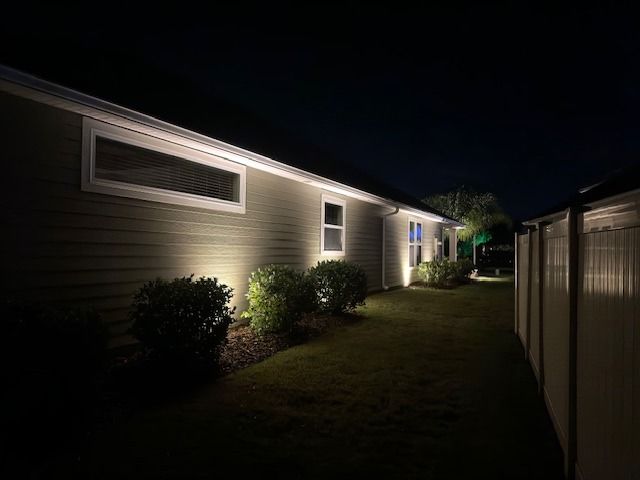
Side Yards: Where Security Gets Real
Side yards are common access routes and common blind spots. Narrow passages between a fence and a wall can feel dark even with a bright fixture if shadows stack up around AC units, bushes, and gate posts.
Place flood lights to cover transitions: gate areas, the side door, and the path between the front and back.
Mounting under eaves along the side wall can work, yet the best results come from cross-lighting. Two smaller floods placed at opposite ends of the side yard often beat one powerful fixture in the middle. Cross-lighting reduces deep shadows and makes motion easier to recognize.
Aim side-yard floods downward with a controlled spread. Light spilling above the fence line becomes neighborhood glare fast. Use shields or adjustable heads so the beam stays on your property surfaces and the walking plane.
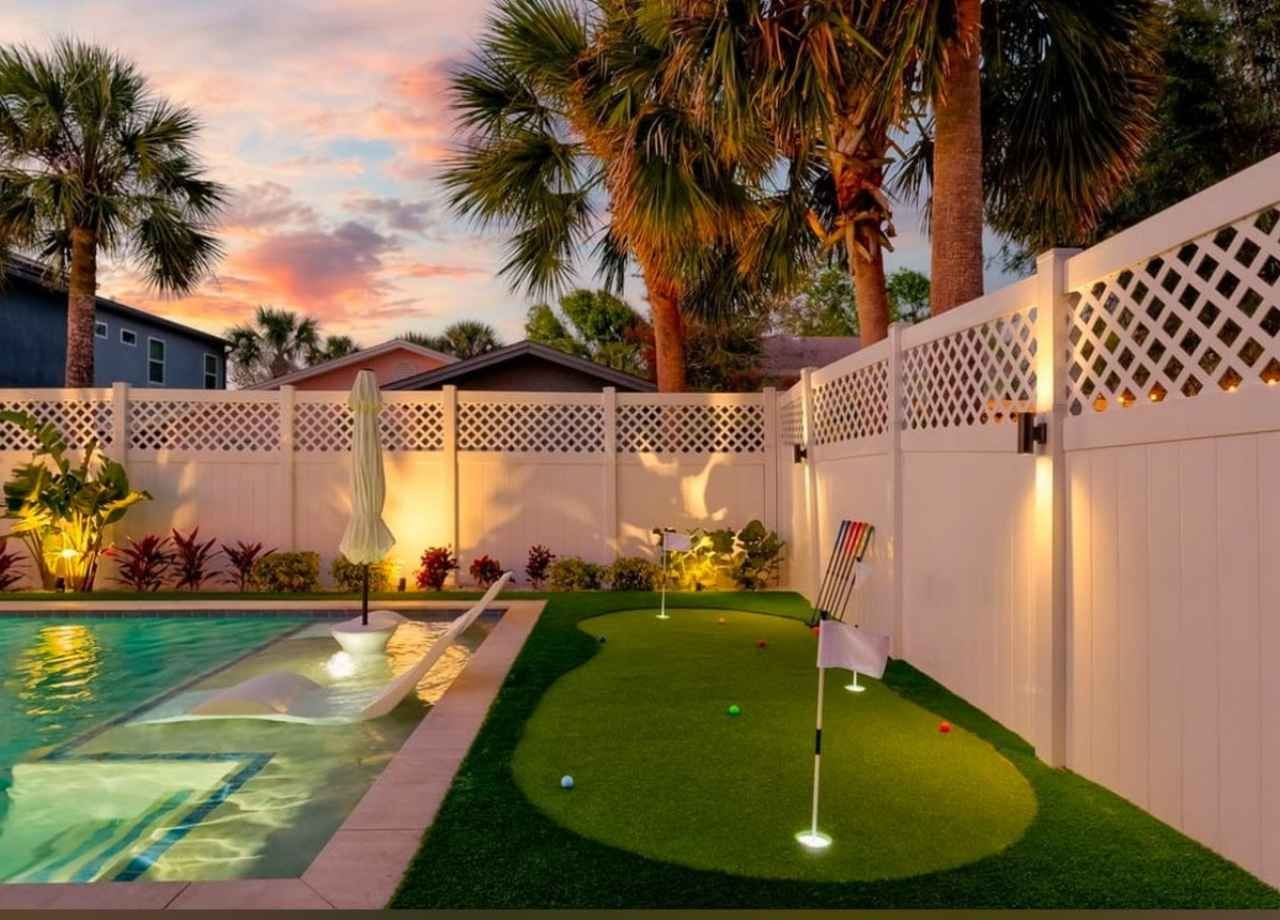
Backyard: Layers Beat One Big Blast
Backyard flood placement depends on how you use the space. A patio that hosts dinners wants a softer, warmer layer plus targeted task light. A pool area needs careful glare control to keep reflections off the water from becoming painful. A large open yard might only need perimeter coverage to discourage unwanted visitors and to help you see pets or kids at night.
Put floods where they can cover key zones without pointing toward seating. Under-eave placements on the rear facade can light a patio, yet aim them so the hotspot lands beyond the seating area and falls off gently toward the house. That keeps faces comfortable and avoids the “interrogation lamp” look.
Perimeter floods can be placed at back corners aimed diagonally across the yard. That diagonal throw reveals movement across a broad area with fewer fixtures. Keep the beam low and controlled so it does not wash the tree canopy or shine into neighboring yards.
Corners of the House: The Highest-Value Mounting Positions
Corners are often the best positions for flood lights because they let you aim across two planes and cover more ground. A flood mounted near a corner can illuminate a side yard and part of the front or back yard with a single fixture, provided the beam spread and aiming angle are right.
Corner placement also improves security because it reduces “flat” lighting. Light coming from the same direction as your line of sight hides texture and makes people look like silhouettes. Light coming from a side angle adds definition, which helps you identify a person and helps cameras capture useful images.
Avoid aiming corner floods straight outward. Aim them across the property lines of sight, staying inside your boundaries. Keep the top of the beam below second-story windows whenever possible.
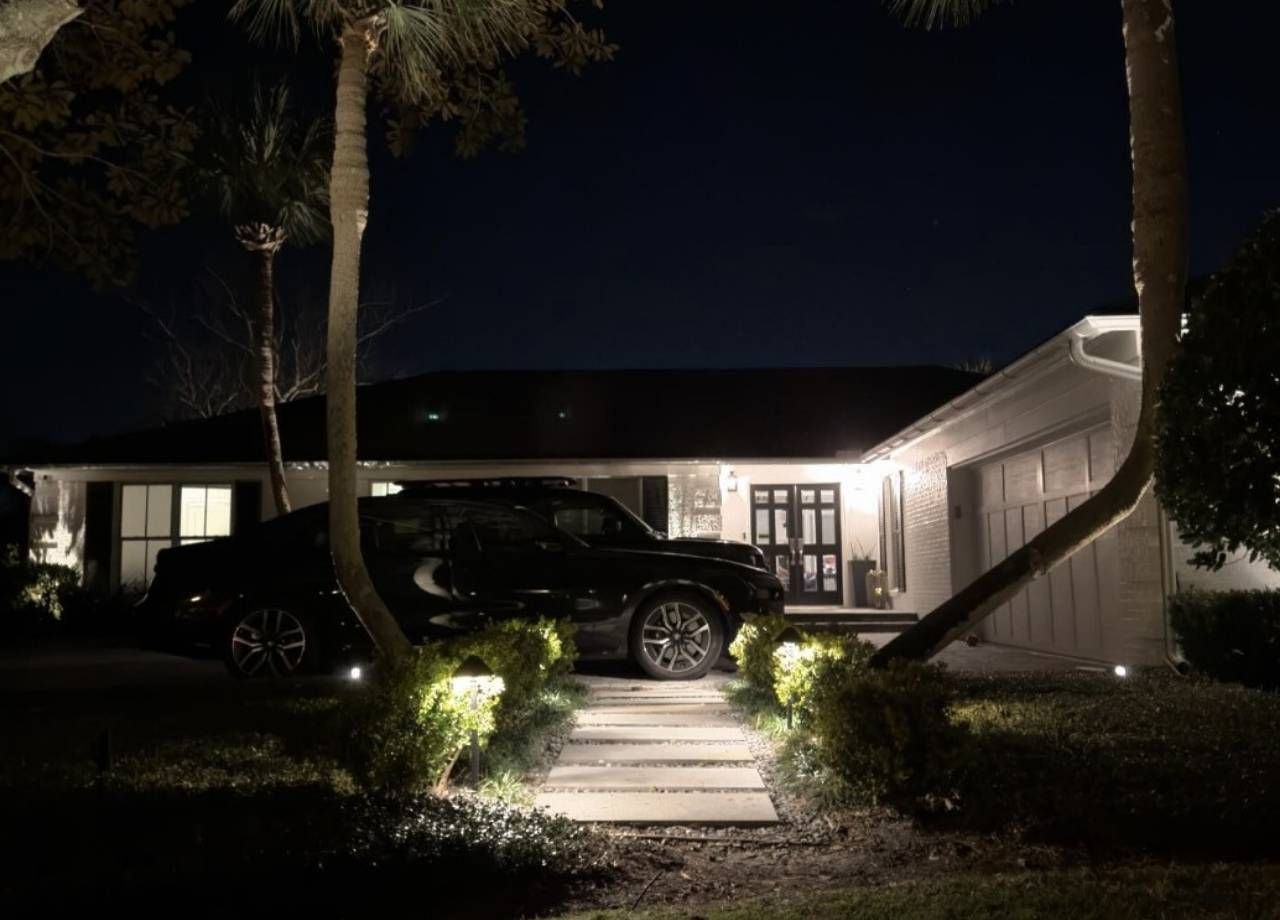
Driveways and Walkways: Put Light Where Feet and Tires Actually Go
Driveways and walks need light on the ground plane. Lots of homeowners light the garage door and think the driveway is covered. Your eyes adapt to the brightest surface, so a bright door can make the ground look darker than it really is.
Mount floods so the beam reaches the driveway apron near the street and the walking path leading to the entry. A slightly higher mounting point under an eave often works, yet the key is aiming downward and outward so the beam lands farther away, not just at your foundation line.
Walkways benefit from overlapping coverage rather than one intense beam. The goal is consistent visibility without dramatic brightness jumps. Flood lights can handle the “area” portion, and smaller path or step lights can handle precision, yet the flood placement should still avoid creating dark pockets behind shrubs or columns
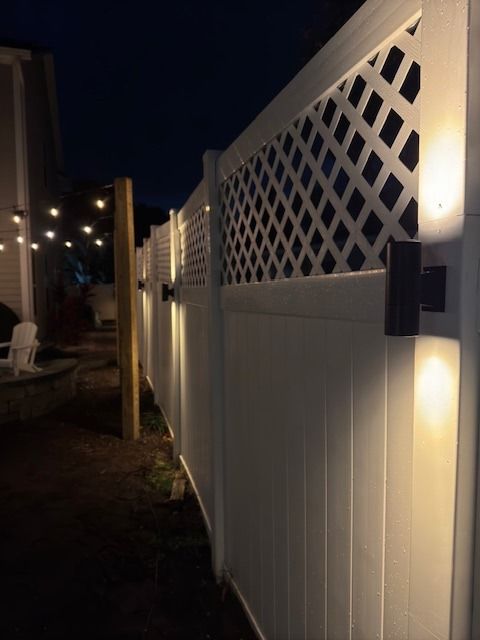
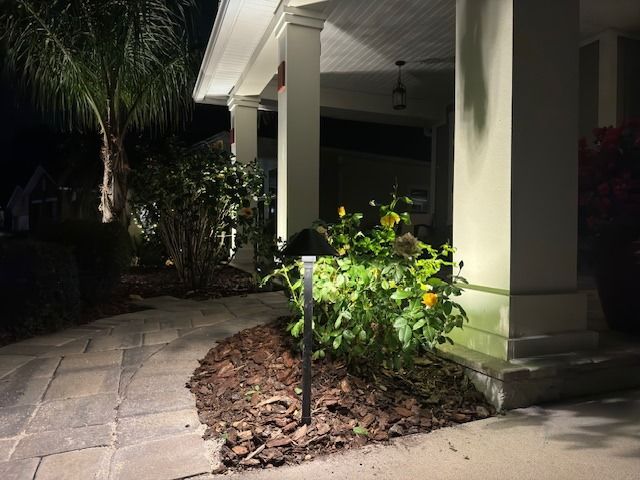
Doors, Gates, and “Choke Points”: Light the Decision Zones
People pause at gates, doors, and side entries. Those are the moments you want visibility. Flood lights should be placed to illuminate faces and hands at those locations without shining directly into a visitor’s eyes.
Mount a flood offset from the door rather than directly above it when possible. Offset placement creates better facial modeling and reduces glare back into the camera if you use one. Keep the beam tight enough that it does not blast bedroom windows or bounce off glossy paint.
Gate lighting works best when the fixture is placed on the house side and aimed down the fence line toward the latch area. That reveals the latch and the ground around it, which is where feet and hands move. A flood pointed straight at the gate panel often wastes light and creates a bright wall that hides what’s happening beside it.
Mounting Height and Beam Angle: The Quiet Difference Between “Bright” and “Useful”
Mounting height controls spread and glare. Too low and the fixture creates harsh shadows and hot spots. Too high and the beam can overshoot, scatter, and spill into windows. Many homes land well with floods mounted under eaves on the first story for side and back coverage, then selectively placed higher for driveway reach or large open yards.
Angle matters more than most people expect. Aim floods so the center of the beam lands on the target zone, then adjust down until the beam cutoff stays below eye level from common viewing positions. Check the view from the sidewalk, from your neighbor’s yard line, and from inside your own rooms.
Use the house itself as a visual reference. If you see the LED source from the street, glare is likely. If the lit area looks like a bright circle with hard edges, the beam spread might be too narrow or the fixture is aimed too steeply.
Avoid These Common Placement Mistakes
Fixtures placed directly above eye level at the front entry often create uncomfortable glare and make visitors squint. Aiming a flood straight outward from the garage tends to light the door and miss the driveway approach. Mounting a flood where it shines into a window wastes light and creates interior annoyance.
Another frequent issue is “shadow stacking.” One flood placed near landscaping lights up the tops of shrubs and leaves the ground behind them dark. Move the fixture farther away, raise it slightly, or cross-light from a different angle so the shrub does not become a shadow wall.
Overlighting is also a real problem. More brightness can reduce visibility by flattening contrast and forcing your eyes to adapt. Good flood lighting feels clear and calm, not blinding.
The Bottom Line: Place Flood Lights to Reveal People and Paths, Not Just Surfaces
The best flood light placement feels intentional. Corners provide efficient coverage. Side yards and gates deserve priority because they are common access routes. Driveways and walkways need ground-focused beams that reach the approach areas. Backyard floods work best when they support real use zones and avoid shining into seating or neighbor windows.
Aim and shielding turn a powerful fixture into a precise tool. When floods are placed to cross-light, minimize glare, and eliminate shadow pockets, your home looks better and functions better after dark.